 Pin it
 My sister called me in a panic two weeks before her daughter's graduation, asking if I could make something special for the celebration party. I found myself scrolling through Pinterest at midnight, half-asleep, when these adorable mortarboard cookies caught my eye. The next morning, I was in the kitchen with flour on my apron and a determined smile, realizing I'd just committed to making 24 tiny edible graduation caps. By the time I nailed the fondant technique, I understood why she'd asked—these cookies aren't just treats, they're tiny celebrations you can hold in your hand.
Standing in my niece's backyard that sunny afternoon, watching cousins and friends pick up these cookies with genuine delight, I realized something shifted in the kitchen weeks earlier. People weren't just eating sugar cookies; they were holding tiny symbols of accomplishment, each mortarboard a small nod to the milestone. That moment, seeing her face light up, made every carefully rolled fondant cylinder worth it.
Ingredients
- All-purpose flour: This is your foundation, and measuring by weight if you have a scale changes everything—no more dense cookies from overpacking the measuring cup.
- Baking powder: Just enough to give the cookies a gentle lift without making them cakey, trust the small amount.
- Unsalted butter: Room temperature is non-negotiable here; cold butter won't cream properly and your cookies will be tough instead of tender.
- Granulated sugar: Creaming this with butter for a full 2 to 3 minutes might feel long, but it incorporates air that makes the cookies light and delicate.
- Large egg: One egg binds everything together; don't skip it or use a substitute unless you know what you're doing.
- Pure vanilla extract: The real stuff matters more in simple cookies like these where vanilla is actually noticeable.
- Black fondant: Buy it pre-colored if possible; trying to dye white fondant black takes forever and your hands will look like you've committed a small crime.
- Yellow fondant: For the tassels, this adds a cheerful pop of color that makes the mortarboards feel authentic.
- Cornstarch: Dust this on your work surface and rolling pin instead of flour, which can toughen fondant if absorbed too heavily.
- Powdered sugar and milk: Mixed into a simple icing that acts as edible glue for fondant decorations.
Tired of Takeout? 🥡
Get 10 meals you can make faster than delivery arrives. Seriously.
One email. No spam. Unsubscribe anytime.
Instructions
- Set up your workspace:
- Preheat the oven to 350°F and line two baking sheets with parchment paper while you gather your ingredients. This 10-minute head start prevents that panicked moment when you're ready to bake but your oven isn't.
- Mix the dry ingredients:
- Whisk flour, baking powder, and salt together in a medium bowl, making sure there are no little lumps hiding in the corners. Setting this aside now means you won't have to hunt for the baking powder once you're elbow-deep in butter and sugar.
- Cream butter and sugar:
- In a large bowl, beat softened butter and sugar together for 2 to 3 minutes until the mixture looks pale and fluffy, like clouds. This is where the magic happens—you're literally whipping air into the dough.
- Add egg and vanilla:
- Beat in the egg and vanilla extract, scraping down the bowl as you go so everything gets incorporated evenly. You'll notice the mixture gets a bit lighter in color again, which is exactly what you want.
- Bring dough together:
- Add the dry ingredients to the wet mixture gradually, mixing just until you don't see streaks of flour anymore. Overmixing here is the enemy—you'll develop gluten and end up with tough cookies, so show some restraint.
- Roll and cut cookies:
- Dust your work surface lightly with flour, then roll the dough to exactly 1/4-inch thickness and cut into 2 1/2-inch rounds or squares. I learned the hard way that thicker cookies stay soft inside but never crisp up enough; thinner ones bake unevenly, so the quarter-inch sweet spot matters.
- Bake until golden:
- Place cookies on prepared sheets and bake for 10 to 12 minutes, watching for the moment when the edges just turn golden but the centers still look slightly underbaked. They'll firm up as they cool, so don't overbake or you'll end up with crunchy shortbread when you wanted tender cookies.
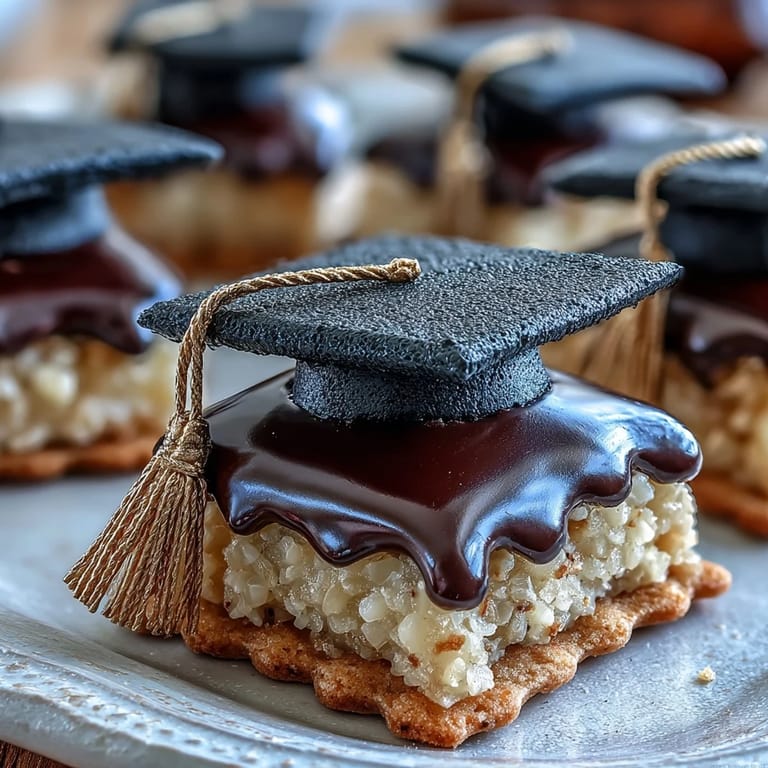
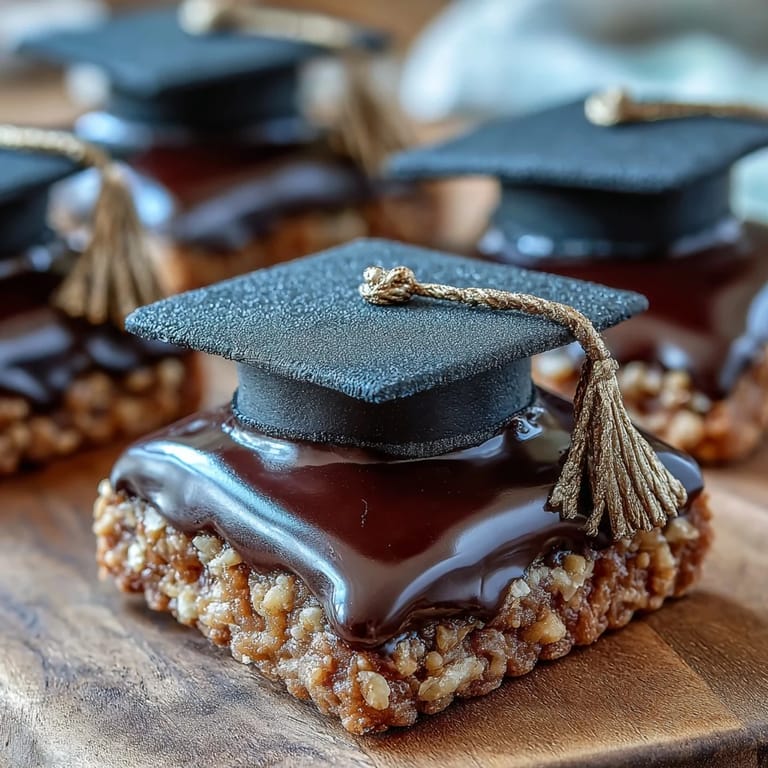
- Prepare fondant mortarboards:
- While cookies cool completely on a wire rack, roll black fondant to 1/8-inch thickness and cut 24 small squares about 1 1/4 inches across for the mortarboard tops. Roll 24 tiny cylinders about 1/2 inch long for the bases; these don't need to be perfect since they'll be hidden under the squares.
- Create yellow tassels:
- Roll yellow fondant into thin ropes and cut into 1-inch pieces, shaping each one however feels right—I curve mine slightly so they look like they're swinging. This is honestly my favorite part because no two tassels look exactly the same.
- Mix simple icing:
- Combine powdered sugar, milk, and vanilla until smooth and spreadable, adjusting milk gradually if it gets too thick. This acts as edible glue, so consistency matters; too thick and you'll crush the cookies trying to spread it.
- Assemble the mortarboards:
- Working one cookie at a time, dab icing on the center, place a black fondant square on top, then position a fondant cylinder underneath for dimension. Use another tiny dab of icing to attach the yellow tassel to one corner of the mortarboard.
- Let decorations set:
- Give the finished cookies 20 to 30 minutes for the icing to dry and the decorations to feel secure before packaging. This patience prevents smudges and shifting during transport or storage.
 Pin it
 Months after the graduation party, I got a text from my niece's roommate asking for the recipe because she was making them for her own celebration. That moment, knowing these cookies had somehow become someone else's tradition before they were even fully my tradition, felt like the best possible ending to an afternoon spent rolling fondant in my kitchen.
Timing and Preparation Strategy
If you're making these for an actual event, the secret is splitting the work across two days. Bake the cookies on day one, store them in an airtight container, then assemble the mortarboards the next day when you're fresh and can actually enjoy the decorating part instead of feeling rushed. I learned this after staying up until 11 p.m. trying to get fondant to cooperate when I'd already been in the kitchen for six hours. The cookies don't care when you decorate them, but your mental state definitely does.
Customizing for School Colors
The black mortarboards are traditional and look sharp, but fondant takes color beautifully if you want to match your graduate's school colors or create something more personal. I've seen versions with burgundy and gold mortarboards, bright blue with silver tassels, even pastel pink for someone who really leaned into their aesthetic. Just remember that gel food coloring works better than liquid for fondant since you're not adding water, and colored fondant can stain your hands, so maybe wear gloves if you care about that.
Shortcuts and Real Talk
There's absolutely no shame in using store-bought sugar cookie dough if you're short on time; I've done it and nobody could tell the difference once the fondant went on. Pre-colored fondant saves an enormous amount of effort and cleanup, and honestly, that's often the smarter choice unless you're genuinely enjoying the decorating meditation. The real magic isn't in making everything from scratch—it's in the thoughtfulness of creating something personalized for someone you care about.
- A small offset spatula makes spreading icing on cookies exponentially easier than using a knife.
- If fondant cracks while you're rolling it, just gently push the edges back together and keep going; no one will notice once it's on the cookie.
- Keep your hands slightly dusted with cornstarch when handling fondant, but don't overdo it or the surface gets slippery and hard to work with.
 Pin it
 These cookies somehow turned into one of my favorite things to make, which surprised me because I'm not usually a decorator. Make them, watch someone's face light up, and you'll understand why a simple sugar cookie with a tiny fondant hat became unforgettable.
Recipe Questions & Answers
- → What ingredients are used for the cookie base?
The cookie base uses all-purpose flour, baking powder, salt, unsalted butter, granulated sugar, egg, and vanilla extract to create a tender sugar cookie.
- → How is the fondant mortarboard shaped?
Fondant is rolled thin, cut into small squares for the mortarboard tops, with cylindrical bases. Yellow fondant is trimmed into tassels for decoration.
- → Can these cookies be stored for later use?
Yes, storing them in an airtight container keeps them fresh for up to 5 days without losing texture or flavor.
- → Is it possible to customize colors of the fondant?
Absolutely. The fondant can be colored to match school colors or personal preferences by using food coloring before shaping.
- → What tools are recommended for decorating?
A small knife or fondant cutter is useful for shaping, along with rolling pins and cookie cutters for preparation and design.