 Pin it
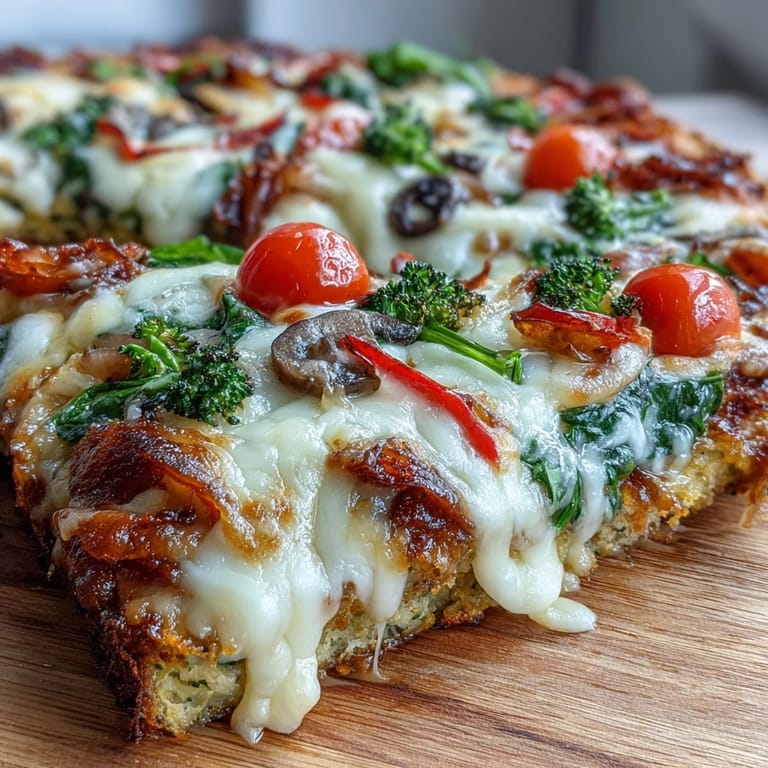
 My friend Sarah texted me at lunch one day asking if pizza could ever be healthy, and honestly, I had no good answer until I started experimenting with this broccoli and chicken crust. The first time I pulled it out of the oven, golden and firm, I couldn't believe it was actually holding together without a grain of flour in sight. My kitchen smelled like roasted broccoli and melted cheese instead of the usual yeast and dough, and somehow that felt like progress. Now whenever someone says they're cutting carbs, this is the first thing I make them try.
I made this for a small dinner party last spring when one of my guests mentioned she was doing keto, and I watched her face light up when she realized what the crust was made of. She ate three slices and asked for the recipe before dessert even came out. That moment reminded me that food doesn't have to be complicated to feel special or to bring people together.
Ingredients
- Cooked broccoli florets: Two cups finely chopped or pulsed until almost rice-like in texture; this is your structural hero, so don't skip the processing step or your crust will fall apart.
- Cooked chicken breast: One and a half cups shredded finely enough that it blends invisibly into the crust rather than leaving chewy bits.
- Large egg: The binder that holds everything together, so use a fresh one and don't try to substitute it.
- Shredded mozzarella cheese: Half cup for the crust and one cup for topping; this melts everything into cohesion and adds richness that broccoli needs.
- Grated Parmesan cheese: A quarter cup that adds that savory, umami depth that makes people wonder what your secret ingredient is.
- Dried oregano and garlic powder: Half teaspoon each; they transform what could taste like plain vegetables into something that actually tastes like pizza.
- Salt and black pepper: A quarter teaspoon of each to taste; season generously because the broccoli can taste bland if you hold back.
- Sugar-free tomato sauce: Half cup spread as your base, keeping the carb count down without sacrificing flavor.
- Fresh vegetables for topping: Red onion, bell pepper, cherry tomatoes, black olives, and baby spinach all add color and nutrition without weighing the crust down.
- Dried Italian herbs: One teaspoon sprinkled before the final bake to tie all those flavors together.
Tired of Takeout? 🥡
Get 10 meals you can make faster than delivery arrives. Seriously.
One email. No spam. Unsubscribe anytime.
Instructions
- Heat your oven and prep your station:
- Preheat to 425°F and line your baking sheet with parchment paper so the crust doesn't stick and you can actually slide it around without falling apart. This step sounds simple but it's honestly the difference between a beautiful pizza and a frustrating cleanup.
- Build your crust base:
- In a large bowl, combine all the crust ingredients and mix until it forms a sticky, uniform dough that holds together when you squeeze it. The texture should be more like a thick paste than actual dough, and that's exactly what you want.
- Shape and pre-bake the foundation:
- Transfer the mixture onto your prepared sheet and shape it into a roughly 12-inch round, about half an inch thick, using damp hands or a spatula so it doesn't stick to you. Bake for 20 minutes until it's firm, golden brown, and feels solid when you press the center gently.
- Add your sauce and base layer:
- Remove the crust from the oven, spread tomato sauce evenly across it, and sprinkle with mozzarella cheese, making sure you get good coverage so every bite has melty, gooey cheese.
- Layer on your toppings:
- Arrange your red onion, bell pepper, cherry tomatoes, black olives, and spinach in whatever pattern makes you happy, knowing that the spinach will shrink down significantly so don't be shy with it. Sprinkle dried Italian herbs over everything.
- Final bake and finish:
- Bake for another 8 to 10 minutes until the cheese is bubbly and starting to brown at the edges. Remove from the oven, let it rest for a few minutes so the cheese sets, then garnish with fresh basil or chili flakes if you want an extra kick.
 Pin it
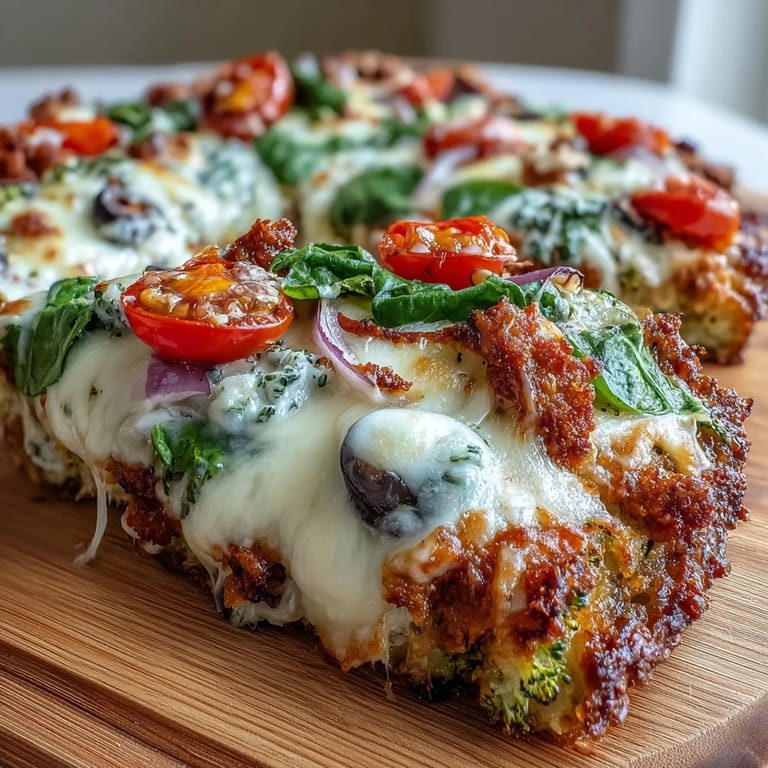
 There's something deeply satisfying about cutting into a pizza and having it actually hold together, especially when you know it's basically vegetables and protein masquerading as comfort food. My partner looked skeptical the first time I served it, then stopped questioning my kitchen experiments entirely after that first bite.
Ingredient Swaps That Actually Work
I've tried mushrooms, artichoke hearts, and grilled zucchini as alternatives to the standard toppings, and honestly they all shine in their own way. The beauty of this pizza is that you can really make it your own without worrying that you're ruining something precious. Cauliflower rice mixed into the crust also works beautifully if you want even more vegetables, though it does make the texture slightly more delicate.
Storage and Reheating Wisdom
Leftover pizza keeps well in the fridge for about two days if you store it in an airtight container, and it reheats best in a 350°F oven for about 5 minutes rather than the microwave, which turns the crust soggy. I've learned the hard way that trying to reheat it at high heat makes the edges crispy while the center stays cold, so low and slow is genuinely the way.
Making It Work for Different Diets
For dairy-free versions, vegan mozzarella and Parmesan alternatives work surprisingly well, though the texture is slightly different and less cohesive. For vegetarians, simply skip the chicken and add an extra half cup of finely chopped broccoli or mushrooms instead. The recipe is already gluten-free as written, but always double-check your packaged ingredients because some seasonings hide sneaky additives.
- Make sure your broccoli is completely dry before chopping or processing it or the crust will be too wet and won't crisp up.
- Don't be afraid to pack toppings generously because the sturdy crust can handle the weight without collapsing.
- If your pizza stone is stone cold from the fridge, let it come to room temperature before baking or it might crack.
 Pin it
 This pizza has genuinely changed how I think about what comfort food can be, and I love that it makes everyone who tries it feel like they're getting away with something. Whether you're eating this way full-time or just trying to mix things up, it delivers on flavor without any compromise.
Recipe Questions & Answers
- → Can I make the crust ahead of time?
Yes, you can prepare and bake the crust up to a day in advance. Store it in the refrigerator wrapped tightly in parchment paper. When ready to serve, add toppings and bake for 8-10 minutes until heated through and cheese is melted.
- → What vegetables work best as toppings?
The crust pairs well with almost any vegetable. Bell peppers, onions, mushrooms, zucchini, spinach, and cherry tomatoes are excellent choices. Avoid overly watery vegetables like fresh tomatoes without draining them first to prevent sogginess.
- → Is the crust firm enough to hold slices?
When baked properly at 425°F for the full 20 minutes, the crust develops a firm, golden texture that holds slices well. Letting it cool for a few minutes after the final bake helps set the structure further for cleaner slicing.
- → Can I freeze the assembled pizza?
Freezing works best if you freeze just the baked crust without toppings. Wrap it tightly and freeze for up to 3 months. Thaw in the refrigerator overnight, then add toppings and bake. The texture remains excellent after freezing.
- → How do I make this dairy-free?
Replace the mozzarella and Parmesan in the crust with nutritional yeast and a dairy-free cheese alternative. Use vegan cheese shreds for the topping layer. The crust may be slightly less crispy without dairy cheese, so consider extending the initial bake time by 3-5 minutes.
- → Why use cooked broccoli and chicken?
Pre-cooked ingredients prevent excess moisture that would make the crust soggy. The broccoli should be steamed or roasted until tender, and the chicken fully cooked before processing. This ensures the crust binds properly and achieves the right texture.