 Pin it
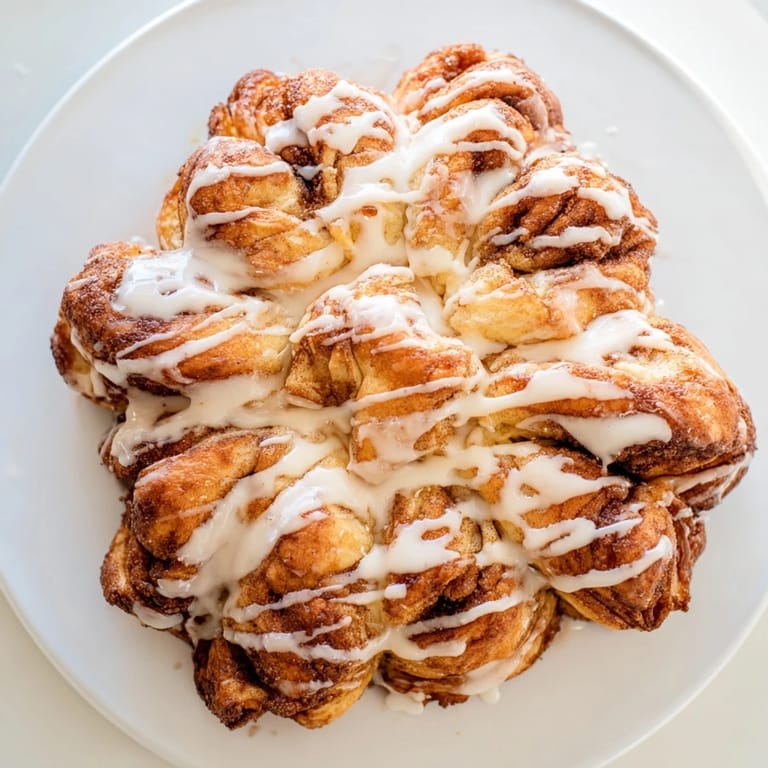
 The first time I made a cinnamon roll snowflake was completely accidental. I'd rolled out three circles of dough intending to layer them with cinnamon sugar, but as I stared at the stack, I realized how perfect it would be to turn it into something festive—something that could be pulled apart and shared. The kitchen smelled like butter and cinnamon, warm and inviting, and suddenly this breakfast pastry became the centerpiece of our winter mornings.
I served this to unexpected guests on a snowy Saturday morning, and watching people's faces light up when they realized they could tear into it themselves—not with a knife, but with their hands—made me understand why this shape matters. It's interactive, playful, and somehow turns breakfast into an event. One guest actually laughed and said it was too pretty to eat, then immediately changed their mind.
Ingredients
- All-purpose flour (3 1/4 cups): The backbone of soft, yielding dough; make sure yours is fresh and stored properly so your dough rises evenly without any dense pockets.
- Granulated sugar (1/4 cup) and active dry yeast (2 1/4 tsp): These wake each other up when mixed with warm milk, creating the frothy base that tells you fermentation is happening just right.
- Warm milk (3/4 cup): Too hot and you'll kill the yeast; too cool and it won't activate, so 110°F is your sweet spot and worth using a thermometer for.
- Unsalted butter (1/4 cup melted, plus 1/4 cup softened): The melted version goes into the dough for richness, while the softened butter is your canvas for spreading the filling—each serves a purpose.
- Egg (1 large): Brings tenderness and golden color to the bake, so bring it to room temperature to blend smoothly into the dough.
- Salt (1/2 tsp): A small amount that quietly balances sweetness and brings flavor forward.
- Packed light brown sugar (1/2 cup) and ground cinnamon (2 tsp): This filling is where the magic happens; the brown sugar dissolves slightly into the butter, creating pockets of caramel-like sweetness throughout.
- Powdered sugar (1 cup), milk (2-3 tbsp), and vanilla extract (1/2 tsp): Your icing should drizzle smoothly without being too thick, so add milk slowly and taste as you go.
Tired of Takeout? 🥡
Get 10 meals you can make faster than delivery arrives. Seriously.
One email. No spam. Unsubscribe anytime.
Instructions
- Bloom the yeast:
- Warm milk, sugar, and yeast together until foamy—this 5–10 minute wait isn't wasted time, it's confirmation that your yeast is alive and ready to work. You'll see bubbles rising to the surface like tiny celebration.
- Build the dough:
- Stir in melted butter, egg, and salt, then gradually add flour until you have a soft, slightly sticky mass. It should come together easily without being a wrestling match.
- Knead until silky:
- Work the dough for 5–7 minutes until it's smooth and elastic, then let it rise in a greased bowl for a full hour. You'll know it's ready when it's doubled and springs back slowly when poked.
- Preheat and prep:
- Get your oven to 350°F and line your baking sheet with parchment paper so nothing sticks.
- Roll and layer:
- Divide the dough into three equal pieces and roll each into a 12-inch circle. This is easier if you let them rest for a minute between rolls so the gluten doesn't fight back.
- Spread the filling:
- Place the first circle on your baking sheet, spread half the softened butter over it, and sprinkle with half the cinnamon-sugar mixture. Layer the second circle on top, repeat with remaining butter and filling, then top with the third circle.
- Create the snowflake shape:
- Place a small glass in the center (it stays there as an anchor), then use a sharp knife to cut 16 equal strips radiating outward like a pie. Take each pair of adjacent strips, twist them away from each other twice so they spiral, then pinch the ends together to form points.
- Final rise and bake:
- Remove the glass, cover loosely, and let the snowflake rest for 15 minutes. Bake for 22–25 minutes until deeply golden, watching for the edges to turn amber.
- Finish with icing:
- Cool for 10 minutes, whisk together your icing, and drizzle it generously over the warm snowflake so it pools into the crevices.
 Pin it
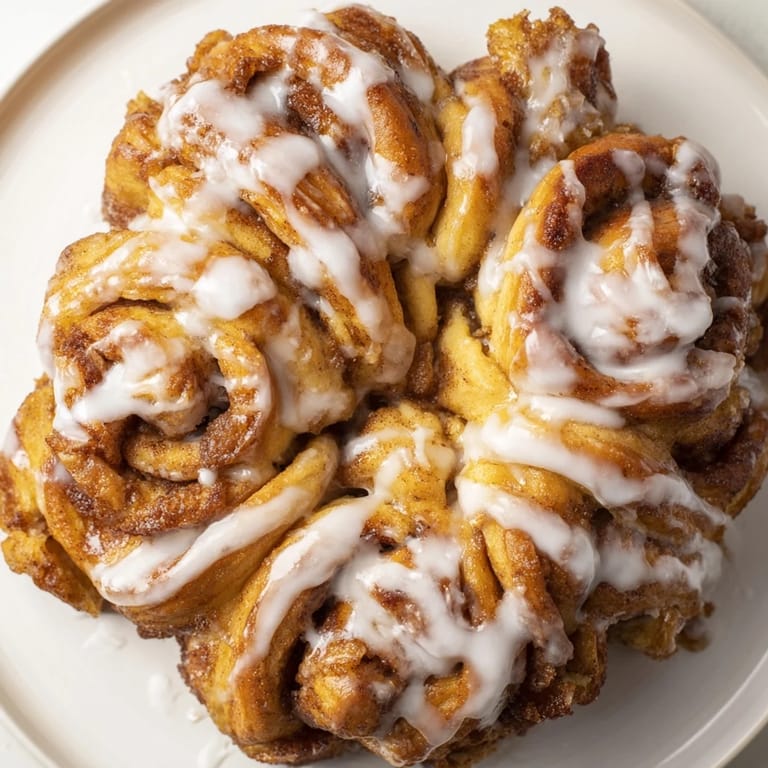
 There's something deeply satisfying about the moment when someone reaches for a piece of this snowflake and discovers it pulls away in a perfect spiral, still warm and yielding. It stops being just breakfast and becomes a small shared joy, which is really what baking is supposed to do.
Perfecting Your Dough Temperature
The warmth of your milk matters more than you might think. I've made this with milk that was too hot and watched the yeast die instantly, producing a dense brick instead of fluffy rolls. I've also made it with cool milk and waited forever for anything to happen. A good thermometer is your friend here—110°F feels almost body-temperature warm when you dip a clean finger in. If you don't have a thermometer, aim for warm but not hot enough to be uncomfortable to touch for more than a few seconds.
The Art of Layering and Spiraling
What makes this snowflake special isn't just the shape—it's the way those three layers of dough with two layers of cinnamon filling create little pockets of sweetness throughout each pull-apart piece. When you twist those strips, you're not just moving dough around; you're creating visual interest while keeping everything together structurally. The twists also catch a bit more heat during baking, giving you those irresistible caramelized edges.
Serving and Storage Ideas
This snowflake is best served within a few hours of baking when it's still tender and the icing is soft, but it holds up beautifully overnight wrapped loosely in foil. Reheat gently in a low oven if you want to bring back some warmth. For a richer variation, substitute half the milk with heavy cream for a more indulgent crumb. If you want texture and depth, fold chopped toasted pecans or plump raisins into your cinnamon-sugar filling—just be gentle when mixing so the layers stay distinct.
- Pairs wonderfully with hot chocolate, strong coffee, or even a simple cup of tea on quiet mornings.
- Make the dough the night before, refrigerate it, and bake fresh in the morning for a weekend breakfast that feels effortless.
- This recipe doubles easily if you're feeding a bigger crowd—just use two baking sheets and stagger them in the oven.
 Pin it
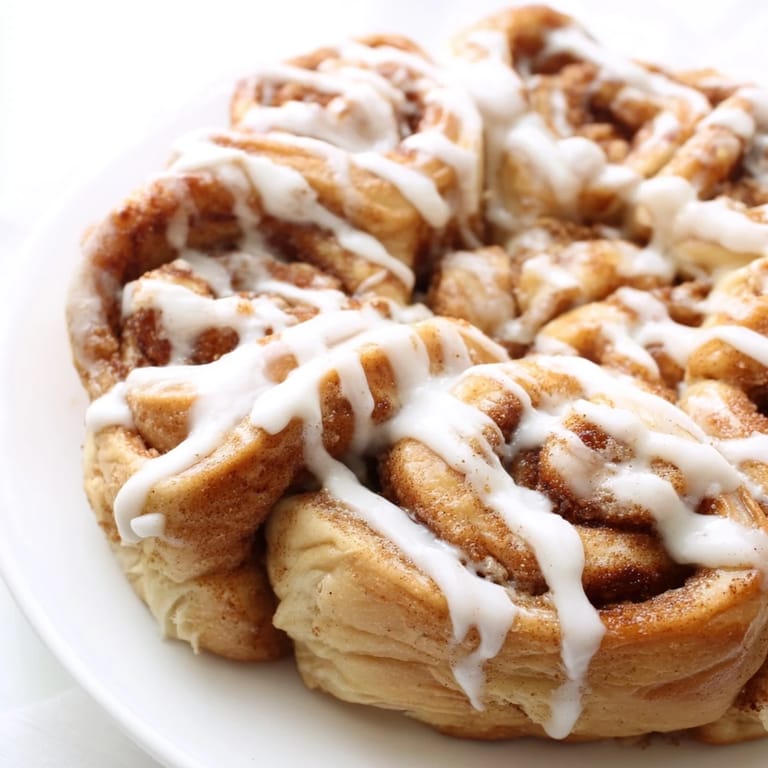
 Baking this snowflake has taught me that the most memorable moments in the kitchen often come from taking something traditional and giving it a shape that makes people smile. It's still just cinnamon rolls, but somehow, it becomes a conversation starter.
Recipe Questions & Answers
- → How do I achieve the snowflake shape?
After stacking the layered dough circles, cut them into 16 strips around a central glass. Then twist pairs of strips outward twice and pinch ends to create six pointed arms forming a snowflake.
- → Can I make the dough richer?
Yes, substitute half of the warm milk with heavy cream to create a richer, more tender dough texture.
- → What is the best way to apply the cinnamon sugar filling?
Spread softened butter evenly over each dough layer, then sprinkle the cinnamon sugar mixture before stacking the next circle to ensure consistent flavor throughout.
- → How long should the dough rise before shaping?
Let the dough rise in a warm place for about 1 hour or until doubled in size, followed by a 15-minute rest after shaping the snowflake before baking.
- → What are good beverage pairings for this treat?
It pairs wonderfully with hot chocolate, coffee, or spiced teas, complementing its sweet cinnamon and vanilla notes.