 Pin it
 Last summer, I watched my roommate press a frozen protein mixture into the Ninja Creami and pull out something that looked impossibly creamy—like soft-serve but actually good for you. I was skeptical until I tasted it, and suddenly I understood why she kept making them. This isn't a protein shake disguised as dessert; it's a real, satisfying ice cream experience that happens to pack nearly 30 grams of protein. The best part is how simple it becomes once you've made it once.
My friend brought one to the gym once, and I watched three people ask her what she was eating—something about watching someone enjoy ice cream at 6 AM before a workout shift the whole vibe. She started making batches for her post-shift comedown, and now it's become her thing. There's something satisfying about treating yourself to dessert that actually fits your routine instead of fighting against it.
Ingredients
- Greek Yogurt: Use unsweetened—it's the secret to creaminess and gives you a protein-rich base that doesn't taste like punishment.
- Almond Milk: This keeps the texture light and prevents the mixture from freezing too solid; other milks work but almond's neutral flavor lets the protein shine.
- Protein Powder: Vanilla and chocolate are your safest bets—buy the good stuff because it's the star ingredient here and cheap powder will taste like it.
- Maple Syrup: Just enough sweetness to make it taste like dessert without making it a sugar bomb; start with 1 tablespoon if you're unsure about your sweetness preference.
- Vanilla Extract: A teaspoon feels small but it rounds out all the flavors and keeps things tasting like ice cream instead of a fitness drink.
- Salt: A pinch seems random but it deepens the flavor and balances the sweetness in a way people can't quite identify.
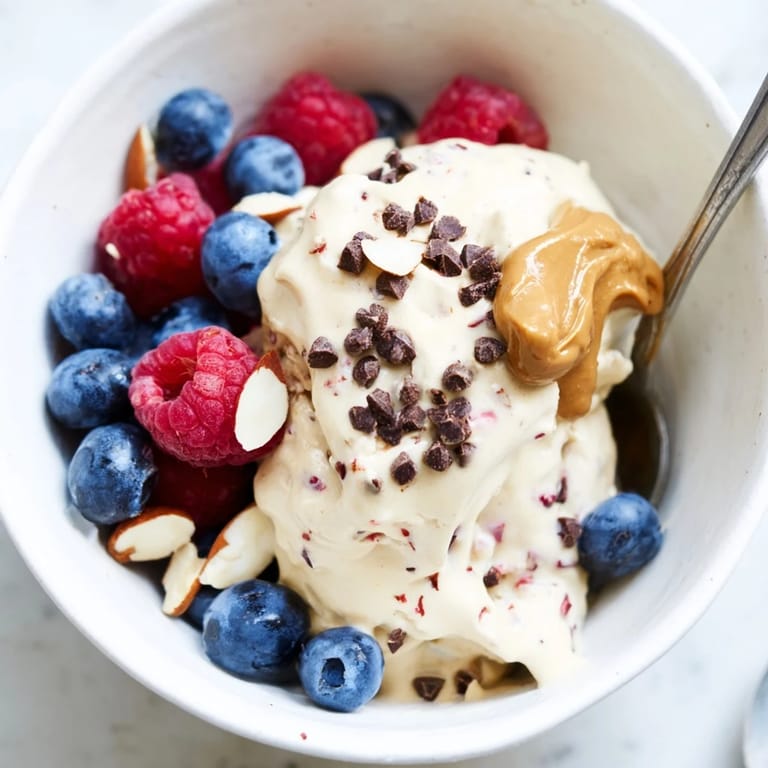
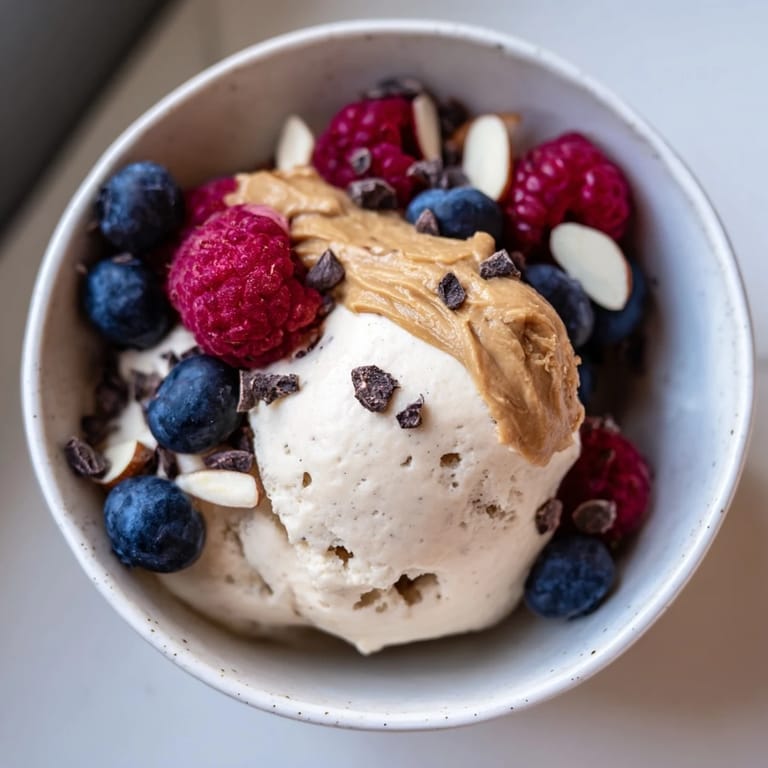
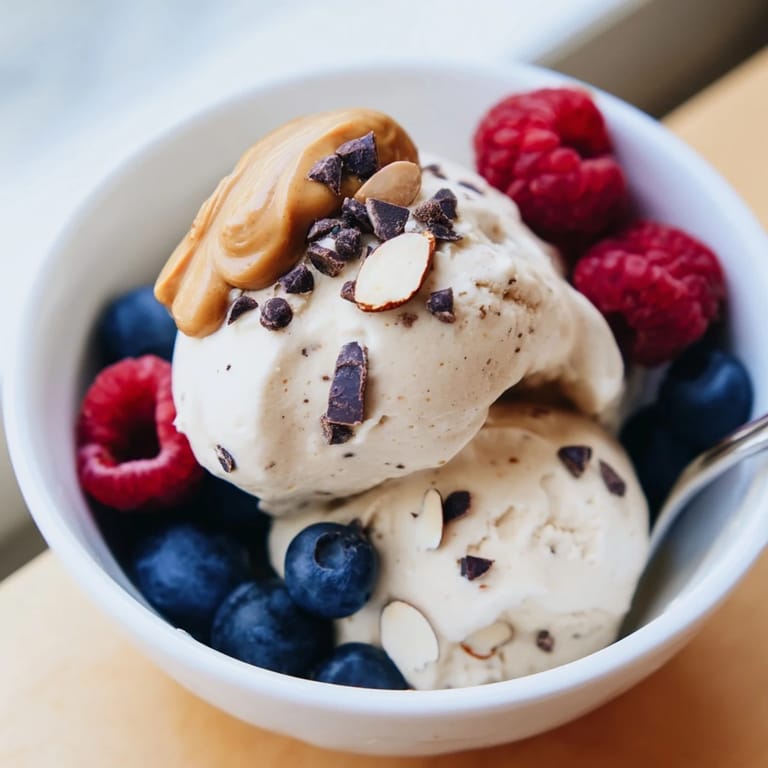
- Toppings: Berries add brightness, nut butters bring richness, chocolate chips feel indulgent, and seeds give you a little crunch to play with textures.
Tired of Takeout? 🥡
Get 10 meals you can make faster than delivery arrives. Seriously.
One email. No spam. Unsubscribe anytime.
Instructions
- Blend everything until it's genuinely smooth:
- Combine your yogurt, milk, protein powder, syrup, vanilla, and salt in the blender and let it run until there are no powder clumps visible. If you see specks of protein powder, keep blending—any grittiness will freeze into an unpleasant texture.
- Pour it into your freezing vessel:
- Use the Ninja Creami pint container if you have one, or any freezer-safe container that's about the same size. Make sure the mixture is level in the container so it freezes evenly.
- Freeze it solid:
- Set it in the freezer for at least 8 hours, ideally overnight. You'll know it's ready when it's completely frozen solid—no slushy spots.
- Process it into ice cream:
- If you're using a Ninja Creami, follow the machine's instructions for ice cream mode. If you don't have one, let it sit at room temperature for 5–10 minutes until slightly softened, then scoop and blend it briefly with a splash of milk in your blender.
- Adjust the texture to your preference:
- If it's too icy, spin it again or add a splash of milk and re-blend. If it's too soft, pop it back in the freezer for 15 minutes and try again.
- Top and eat immediately:
- Scoop it into a bowl, add whatever toppings call to you, and eat it right away before it melts into a puddle.
 Pin it
 There was a moment when my roommate made one on a random Tuesday evening and we just sat on the porch eating it while talking about nothing important. It hit me that this was somehow both a dessert and a legitimate post-workout recovery tool, and nobody had to choose between enjoying their food and taking care of their fitness. That's when this recipe stopped being a trend and became something I actually wanted to keep making.
Flavor Variations Worth Trying
Once you've nailed the basic vanilla version, the variations are where things get fun. Adding cocoa powder transforms it into chocolate, instant coffee powder gives you a mocha vibe, and fruit purees (blend frozen berries or banana into the base) create naturally sweet fruity versions. I've found that fruit purees actually make the mixture taste less like protein and more like a real ice cream flavor, so if you're new to protein desserts, starting with a berry or strawberry variation might win you over faster than plain vanilla.
Making It Work for Your Diet
The whole appeal of this recipe is how flexible it is for whatever you're aiming for. Vegan? Swap the Greek yogurt for plant-based yogurt and use vegan protein powder. Trying to cut sugar? Use a zero-calorie sweetener or skip it entirely and let the fruit puree do the work. Want even more protein? Add an extra scoop of powder, though you might need a tiny splash more milk to keep the texture right.
Storage and Make-Ahead Hacks
These freeze beautifully for up to two weeks, so you can make a batch on Sunday and have protein ice cream ready whenever you want it. The toppings are where you can have fun experimenting—I keep a few different options in my pantry so I can switch things up depending on my mood without extra work. The key to keeping it tasting fresh is transferring it to an airtight container after the initial freeze if you're storing it longer than a few days, and not leaving it out at room temperature any longer than necessary.
- Store the pint container in an airtight bag to prevent freezer burn and keep the flavor protected.
- Keep a rotation of toppings ready so you can customize without extra planning.
- If it gets too hard after a few days of freezing, let it sit out for 5 minutes before trying to process or scoop it.
 Pin it
 This recipe became my answer to the question of how to enjoy dessert as part of your fitness routine instead of despite it. It tastes like you're treating yourself, which makes you actually want to eat it.
Recipe Questions & Answers
- → What ingredients create the creamy base?
The base combines unsweetened Greek yogurt, almond milk, protein powder, maple syrup, vanilla extract, and a pinch of salt for smoothness.
- → How long should the mixture freeze?
Freeze the blended mixture for at least 8 hours or overnight until completely solid for the best texture.
- → Can I customize the toppings?
Yes, add fresh berries, nut butters, chocolate chips, nuts, or seeds to personalize flavors and textures.
- → Is there a vegan option available?
Use plant-based yogurt and vegan protein powder instead of dairy ingredients for a vegan-friendly version.
- → How can I adjust sweetness levels?
Sweetness can be adjusted by varying maple syrup or omitting it entirely for a lower-sugar treat.
- → What tools are needed for preparation?
A blender and a freezer-safe container are essential, and a Creami machine or similar helps achieve ideal creaminess.